Thursday, December 18, 2008
Mahara Tutorials for Students and Faculty
Here is the first tutorial:
(These videos look best when zoomed to full screen.)
Here are the additional tutorials:
Part II - Sylvan Mahara - Creating Views (aka - "Web Sites")
Part III - Sylvan Mahara - Set Viewing Permissions (for other Mahara users)
Part IV - Sylvan Mahara - Creating Groups
Friday, May 16, 2008
Teacher Created Software with Web 2.0
Macintosh Versions:
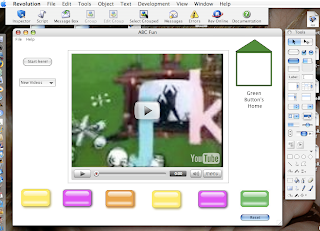
ABC-Fun!
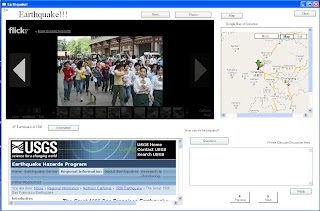
EarthQuake!
Windows Versions:
ABC-Fun!
Earthquake!
The two example applications that are linked at the bottom of this post are full, standalone applications you can use on your Windows or Macintosh computers. They grab resources
 available on the web and nest them within the applications. One concern many teachers have, especially with younger students, is utilizing web resources in a more teacher directed manner. Also, teachers often do not like the fact that when students are doing research, a web browser can often lead students astray to non-essential web sites. This strategy mitigates some of these issues. Revolution does have a small slight learning curve, but once understood, the methods used in these applications can be re-used over and over again.
These applications and ideas were actually hatched after answering successive requests from my three year old daughter for music videos from the movie Enchanted on YouTube. She is not quite old enough to be searching YouTube for her videos on her own, so I was thinking of a way to provide her an easier interface to access those videos. This ABC Fun application is a derivative of that first application and address language arts and computer skills at the kindergarten level.
This is a proof of concept since I did not spend a much time sprucing it up and there may be a few quirks left to fix too.
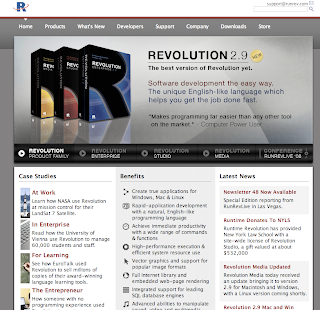
This application was created using a development program called Revolution, http://www.runrev.com. If you remember the days of Apple Computer's, now Apple Inc., Hypercard, you can get a general idea of Revolution. Revolution is a cross between Hypercard and and some of the more common object oriented programming languages of today.
With Revolution you can create custom software that can embed any web resource (YouTube, VoiceThread, GoogleMaps, etc., etc.) directly into your application. This may limit the possibility of students getting distracted; such as when they access these resources in a traditional web browser and accidentally navigate to a different web site. Plus it provides you with the ability to focus attention directly at the content, and provide interaction with the content in way a web browser may not. Using Revolution may give teachers a better strategy for taking advantage of web resources with primary age students. What do you think?
I quickly created the second application in about 20 minutes titled Earthquake to demonstrate some additional interfaces that can be created. It actually took longer to write this post than it did to create the Earthquake application!
Give them a try, and let me know what you think!
For questions or more information, please contact John Patten at jpatten@sylvan.k12.ca.us.
Thursday, March 20, 2008
Using the "Lesson" Activity in Moodle
Warning! The video is 6 minutes long, and is 45MB in size. If you have slow connection to the Internet, you may want to jump right to the tutorials below the video.
If the video does not appear above this text, click this link (This link requires QuickTime player from Apple. You can download it here.
TUTORIALS
Creating a Lesson Activity on Moodle
1. Setting up Groups on Moodle and Adding Students to the Groups
2. What Does A Lesson Activity Look Like? (Preview of a vocabulary example)
3. Part I - Creating the Lesson in Moodle
4. Adding a Question to the Lesson
5. Add a Second Question to the Lesson
6. How it Appears to the Student
The example above is a very basic example of the Moodle Lesson activity. With more time and a little more creativity a lot more can be done with the Lesson activity.
I encourage you to try it out with your students and if you have any questions don't hesitate to shoot me an email or post your question to the blog.
Thursday, February 28, 2008
PowerPoint Games - Updated
If the video does not appear above this text, click this link. (This link requires QuickTime player from Apple. You can download it here.
The link below is the screen cast tutorial that reviews the process of creating this type of PowerPoint game.
Tuesday, February 26, 2008
Creating Learning Games with PowerPoint
If the video does not appear above this text, click this link. (This link requires QuickTime player from Apple. You can download it here.
The following two links are a couple of tutorials covering two examples I whipped up to demonstrate using PowerPoint as a game. I also included the actual PowerPoint templates so that you can open them up and modify them for your own use.
Vocabulary Challenge - "Time Line Model"
- PowerPoint Template - "Time Line Model"
Vocabulary Challenge - "Jeopardy Style Model"
- PowerPoint Template - "Jeopardy Style Model"
The following screen cast is a tutorial that will walk you through the process of creating your very own PowerPoint game.
How to Create a PowerPoint Game - Tutorial
PowerPoint Game Links
FETC PowerPoint Games: http://teach.fcps.net/trt4/FETC03/fun2.htm
PowerPoint Game Templates: http://jc-schools.net/tutorials/PPT-games/
Parade of Games - http://facstaff.uww.edu/jonesd/games/index.html
PowerPoint Games - http://teach.fcps.net/trt14/Power%20Point%20Games/power_point_games.htm
Classroom Game Templates and More - http://www.murray.k12.ga.us/teacher/kara%20leonard/Mini%20T's/March%20Mini%20T-Games/Games.htm
Wednesday, February 20, 2008
Part II - Using Web Apps to Develop Vocabulary Review
 In the Part I of the lesson I shared on February 12th (which is posted below), I showed you how to collect Creative Commons licensed images off Flickr to support your vocabulary instruction. One of the things I like about technology is the fact that your initial time and effort in gathering and creating your initial vocabulary PowerPoint, can be leveraged over and over again with minimal effort. Resources that are digital are easily transferred from one instructional format to the next. Why would you want to do this? Well, the more ways we can engage students with the content we are attempting them to learn, the better off our results. There is a finite number of times we will be able to use an instructional resource, (in the same “environment/manner/students” and in the same style,) with optimum student interest. We need to change things up, differentiate the ways we present the content to keep students engaged. Digital resources allows you to easily do this and with the varietyof new, free or low cost technologies the initial content can be remixed into new engaging resources.
I will be focusing on three strategies that will result in three different new instructional resources. The first is just a physical change in delivery. The original resource (PowerPoint presentation) stays the same, but how the students access it changes. In the second example, the content and the delivery changes, and in the third example, the content changes, but delivery stays the same. How about that for mixing things up?
Example One
Cliff Notes Version - Use a set of inexpensive USB flash drives and allow students to check them out and use at home. You can place the installer for the PowerPoint Viewer on the the USB drive and any PowerPoint presentations you have created for your students. )
Note: Anytime you begin moving USB flash drives between school and home you run the risk of acquiring a computer virus. In most cases, such as ours, your school computers will be protected by the computer virus protection software installed on it. It is important that your school computer has the most updated virus definitions from your virus product tool before you begin USB flash drive check out system in class.
Note II: Your teacher station has a CDRW drive in it. This means you could do something similar just using CDs instead of USB flash drives. I'll demostrate this in a future post.
People in the computer industry measure computer advancements in terms of them doubling in capability, every 18-24 months. A well know engineer and co-founder of Intel, Gordon Moore, reported this in 1965 and it is now know as Moore’s Law. Advancements in technology and computing capability have supported this original research for over 40 years, and it does not appear to be slowing down in the near future. One example of this, which leads to my first example, is digital storage space. We have gone from computers that had hard drives of 40MB, about the capacity of 30 3.5 “floppy disks”, to computer that now can come with 1 Terabyte of storage, about the capacity of 769,230 “floppy disks.” These changes took place in less than 20 years. One relatively new storage medium we have are USB flash drives. Some people call them “thumb drives.” Originally these came in pretty small sizes. About 4 years ago you get a 64MB or 128MB drive for around $30 dollars, now $30 dollars will get you a thumb drive that is from 4-8GB in size. So what does this all mean? Well, the 64MB or 128MB thumb drives are as cheap as $7. At the next educational conference you go to, the vendors there will probably be giving them away for free! Swing by a few of their booths’ a couple of times and you’ll create a nice classroom collection...no joke! Once you have a few of these, start a check-out system in your classroom for students to check them out and take home. Before they check them out, load them up with the, free, Microsoft PowerPoint Viewer installer and your vocabulary lesson PowerPoint, and the students can review the content at home with Mom or Dad! For those of view that are not familiar with thumb drives, the tutorial below will walk you through the process of using one and setting it up for your students.
1. Organize your resources on your computer
2. Download and save the Microsoft PowerPoint Viewer Installer application.
- You can download the Microsoft PowerPoint Viewer Installation disk HERE.
3. Copy PowePoint Viewer Installer and your Vocabulary PowerPoint presentation to the USB flash drive.
4. Create a "Read Me First" basic text file to provide instructions and save it to the USB flash drive.Example Two
The tutorial below will walk you through the process of taking your existing PowerPoint presentation and converting it into a SlideShare presntation and then posting it to your classroom web site.
1. Create a new account on SlideShare.net
2. Upload your PowerPoint presentation.
3. Copy the html embed code into your classroom web site and test your new web resource.
- Special Additional Note: It appears you have to make your SlideShare presentation PUBLIC in order for the embed html code to work.
Example Three
Example three follows much of he same processes as example two. In this remix of your PowerPoint vocabulary resource you will be combining high end video transitions and adding a music sound track to add just a bit more “spice” to your vocabulary presentation. We will be using another free web resource titled Animoto. This web resource will require that we export each one of our PowerPoint slides as a single images. These images are then loaded up into Animoto via your web browser, remixed together, and a soundtrack can be added by you compete the new resource. As with SlideShare, this new resource will have an embed code that you can copy and past into your classroom web site (via the html window).
Below is an example:
Below are the steps to create your own Animoto vocabulary review presentation.
1. Export you PowerPoint presentation as individual jpeg slides.
2. Duplicate your slides a couple of times.
3. Upload images into Animoto.
4. Select a sound track for your presentation.
5. Copy embed html code and paste it into your classroom web site.
No two Animoto presentations are ever the same. That means you could take the same exact images and create a second movie and the resulting movie would be different from the first.
For example:
*Floppy disk image courtesy of: http://farm3.static.flickr.com/2157/2225888887_4cd1d7bc6c_m.jpg
Tuesday, February 12, 2008
Using Flickr to Develop Vocabulary Review
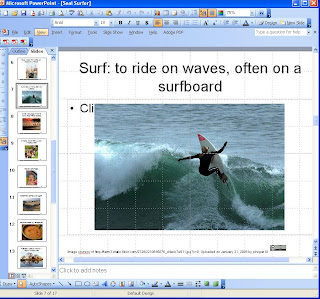 I took the story Seal Surfer by Michael Foreman, out of the State adopted Houghton Mifflin Language Arts text and developed a little PowerPoint presentation to strengthen vocabulary lessons in the text book. Using Flickr, http://www.flickr.com/, and the images other photographers have taken and shared on the site under Creative Commons licensing, I combined them with the story’s vocabulary lessons. The initial investment in time of gathering the complimenting Flickr images to go with the story vocabulary will be reused over and over in subsequent lesson examples. This example will demonstrate how to search for images licensed under Creative Commons copyright, save them to your local computer with their original author’s information embedded into the images so they are easy to cite when used later. These images will be combined with the key vocabulary words to create a simple PowerPoint presentation that you could use with your students.
 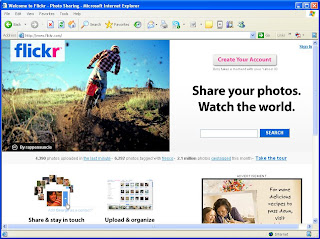 A Creative Commons license means the author of the work will allow other people to use their photographs in other works, whether that be PowerPoint presentations or a school report. I find Flickr to be very easy to use and share many of my own photographs on my own Flickr account. That being said, I would only recommend this site for teachers to use and would never recommend individual student use without direct adult supervision. To use Flickr to gather images licensed under Creative Commons copyright, you will need use the advance search function in Flickr. In the search window check the boxes for finding photos that are licensed under Creative Commons, type in your search term, and review the results. When you find an image that you would like to save and use in your own PowerPoint, click on the image, select the appropriate size, and then right-click the image selecting the “Save Image as…” option. Be sure to save the image in a location you will remember later when you are creating your PowerPoint. The last part of this process is to embed the link to the original image on Flickr within the photograph’s image properties. This way you can properly cite the original author of the photograph when you import it into your PowerPoint presentation.
 1. Create a title slide of the cover of your story using your cell phone and edit the image online in the free software called Picnik.
2. Search Flickr for photographs licensed under Creative Commons
3. Create your PowerPoint Vocabulary Presentation
Let me know how it goes and if you create a vocabulary based PowerPoint send me a copy so we can share!
Next time, learn how to take your finished PowerPoint presentation and repurpose it in different formats for additional "learning mileage!"
Until next time...
Friday, February 8, 2008
The Beginning...
Stay "tuned" for more...


.jpg)