 In the Part I of the lesson I shared on February 12th (which is posted below), I showed you how to collect Creative Commons licensed images off Flickr to support your vocabulary instruction. One of the things I like about technology is the fact that your initial time and effort in gathering and creating your initial vocabulary PowerPoint, can be leveraged over and over again with minimal effort. Resources that are digital are easily transferred from one instructional format to the next. Why would you want to do this? Well, the more ways we can engage students with the content we are attempting them to learn, the better off our results. There is a finite number of times we will be able to use an instructional resource, (in the same “environment/manner/students” and in the same style,) with optimum student interest. We need to change things up, differentiate the ways we present the content to keep students engaged. Digital resources allows you to easily do this and with the varietyof new, free or low cost technologies the initial content can be remixed into new engaging resources.
I will be focusing on three strategies that will result in three different new instructional resources. The first is just a physical change in delivery. The original resource (PowerPoint presentation) stays the same, but how the students access it changes. In the second example, the content and the delivery changes, and in the third example, the content changes, but delivery stays the same. How about that for mixing things up?
Example One
Cliff Notes Version - Use a set of inexpensive USB flash drives and allow students to check them out and use at home. You can place the installer for the PowerPoint Viewer on the the USB drive and any PowerPoint presentations you have created for your students. )
Note: Anytime you begin moving USB flash drives between school and home you run the risk of acquiring a computer virus. In most cases, such as ours, your school computers will be protected by the computer virus protection software installed on it. It is important that your school computer has the most updated virus definitions from your virus product tool before you begin USB flash drive check out system in class.
Note II: Your teacher station has a CDRW drive in it. This means you could do something similar just using CDs instead of USB flash drives. I'll demostrate this in a future post.

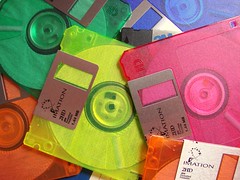
People in the computer industry measure computer advancements in terms of them doubling in capability, every 18-24 months. A well know engineer and co-founder of Intel, Gordon Moore, reported this in 1965 and it is now know as Moore’s Law. Advancements in technology and computing capability have supported this original research for over 40 years, and it does not appear to be slowing down in the near future. One example of this, which leads to my first example, is digital storage space. We have gone from computers that had hard drives of 40MB, about the capacity of 30 3.5 “floppy disks”, to computer that now can come with 1 Terabyte of storage, about the capacity of 769,230 “floppy disks.” These changes took place in less than 20 years. One relatively new storage medium we have are USB flash drives. Some people call them “thumb drives.” Originally these came in pretty small sizes. About 4 years ago you get a 64MB or 128MB drive for around $30 dollars, now $30 dollars will get you a thumb drive that is from 4-8GB in size. So what does this all mean? Well, the 64MB or 128MB thumb drives are as cheap as $7. At the next educational conference you go to, the vendors there will probably be giving them away for free! Swing by a few of their booths’ a couple of times and you’ll create a nice classroom collection...no joke! Once you have a few of these, start a check-out system in your classroom for students to check them out and take home. Before they check them out, load them up with the, free, Microsoft PowerPoint Viewer installer and your vocabulary lesson PowerPoint, and the students can review the content at home with Mom or Dad! For those of view that are not familiar with thumb drives, the tutorial below will walk you through the process of using one and setting it up for your students.
1. Organize your resources on your computer
2. Download and save the Microsoft PowerPoint Viewer Installer application.
- You can download the Microsoft PowerPoint Viewer Installation disk HERE.
3. Copy PowePoint Viewer Installer and your Vocabulary PowerPoint presentation to the USB flash drive.
4. Create a "Read Me First" basic text file to provide instructions and save it to the USB flash drive.Example Two
The tutorial below will walk you through the process of taking your existing PowerPoint presentation and converting it into a SlideShare presntation and then posting it to your classroom web site.
1. Create a new account on SlideShare.net
2. Upload your PowerPoint presentation.
3. Copy the html embed code into your classroom web site and test your new web resource.
- Special Additional Note: It appears you have to make your SlideShare presentation PUBLIC in order for the embed html code to work.
Example Three
Example three follows much of he same processes as example two. In this remix of your PowerPoint vocabulary resource you will be combining high end video transitions and adding a music sound track to add just a bit more “spice” to your vocabulary presentation. We will be using another free web resource titled Animoto. This web resource will require that we export each one of our PowerPoint slides as a single images. These images are then loaded up into Animoto via your web browser, remixed together, and a soundtrack can be added by you compete the new resource. As with SlideShare, this new resource will have an embed code that you can copy and past into your classroom web site (via the html window).
Below is an example:
Below are the steps to create your own Animoto vocabulary review presentation.
1. Export you PowerPoint presentation as individual jpeg slides.
2. Duplicate your slides a couple of times.
3. Upload images into Animoto.
4. Select a sound track for your presentation.
5. Copy embed html code and paste it into your classroom web site.
No two Animoto presentations are ever the same. That means you could take the same exact images and create a second movie and the resulting movie would be different from the first.
For example:
*Floppy disk image courtesy of: http://farm3.static.flickr.com/2157/2225888887_4cd1d7bc6c_m.jpg
.jpg)
1 comment:
Oooohhh!! I forgot how much I like Animoto. I feel a Animoto-based vocabulary project coming on. In the picture at the top of your post - what are those colorful square things? I've never seen those before. :-)
Post a Comment